Description
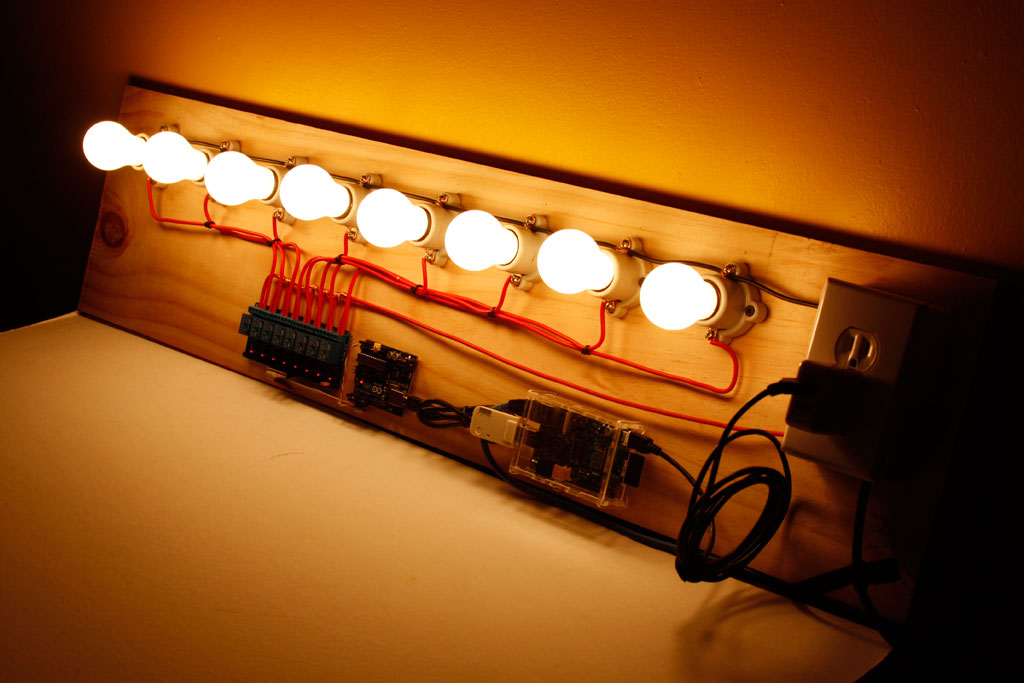
Program to control Lights, doors, etc. using Open Hardware and control them using a phone line connected to Asterisk PBX.
The main purpose of this project is:
- Bring a light schema to control Relays with Arduino ONE board
https://www.arduino.cc/en/Main/ArduinoBoardUno - Make a control vector using a Perl script to interface Asterisk PBX
and the open hardware boards.
http://www.asterisk.org - Using the phone Dialpad to control on/off events
Steps
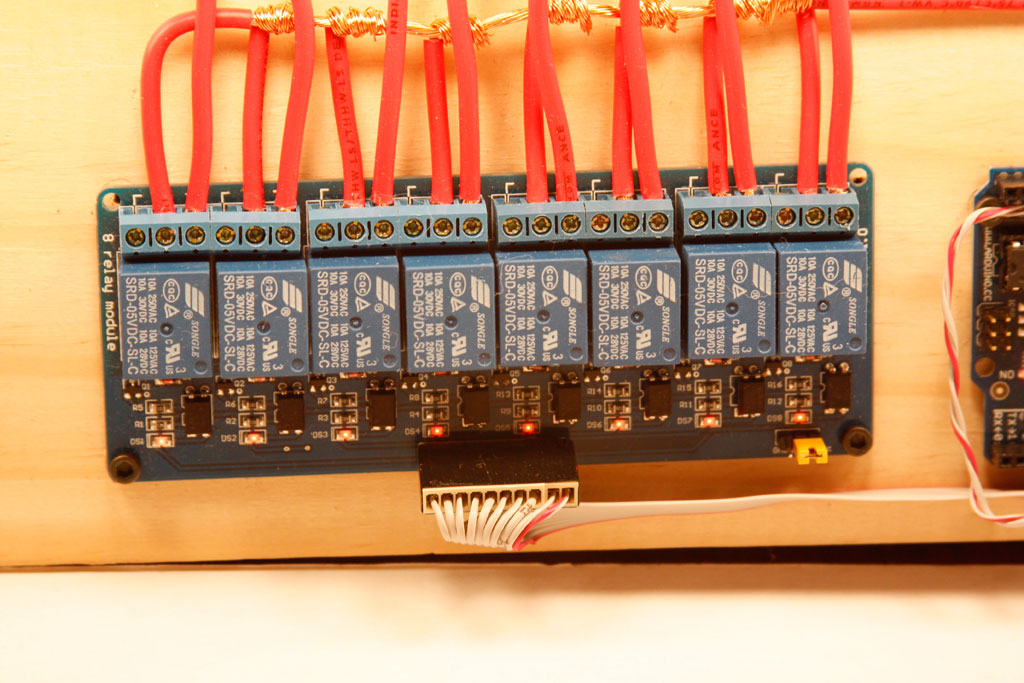
- I buy a relay board in www.buyincoins.com for about $8.00 USD
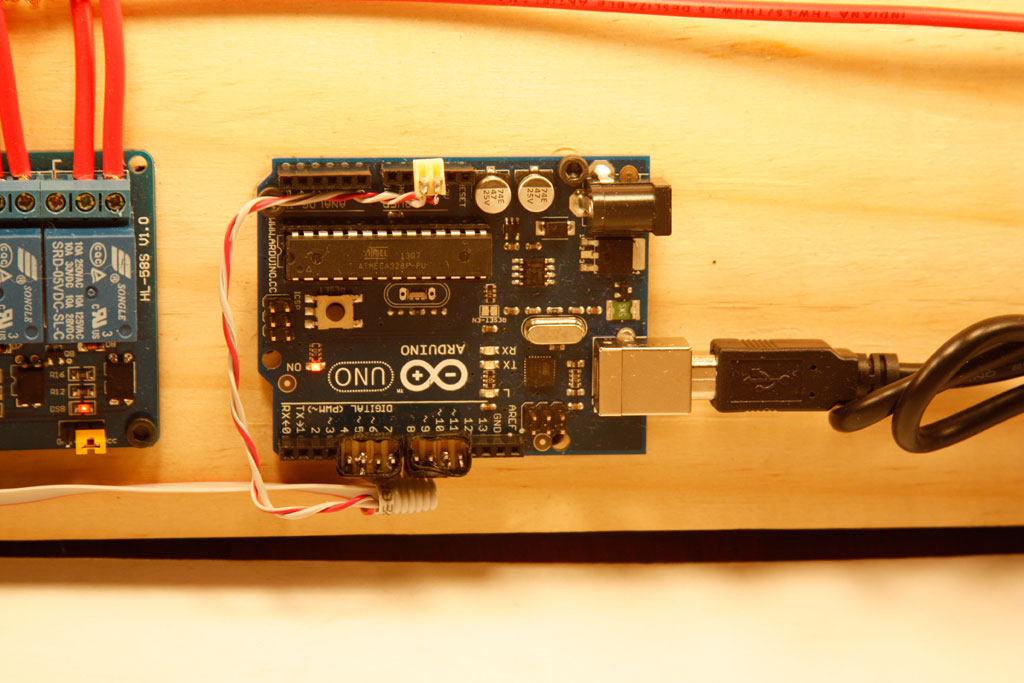
- I use one Arduino UNO with a cost of $30.00 USD
- To make Asterisk PBX to work, i purchase a Raspberry Pi in newark.com for about $55.00 USD and use RasPBX (a Debian variant for Raspberry Pi with Asterisk include).
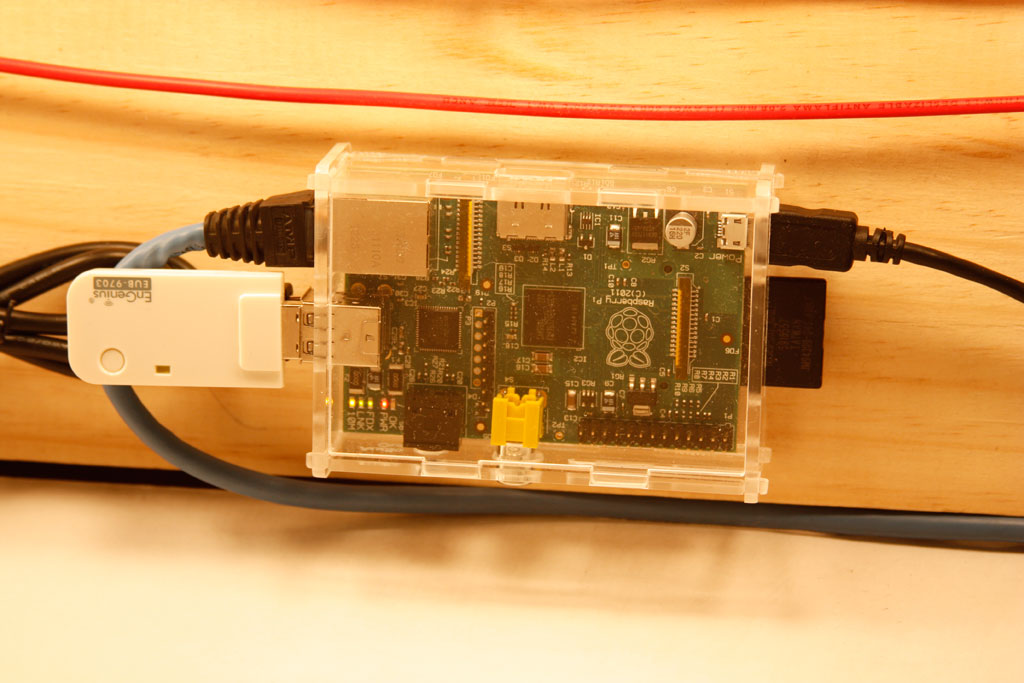
- Plus a wood board, wires, screws, sockets and electrical contacts for $35.00 USD. One EnGenius WiFi USB adapter for $30.00 USD and a power supply for $18.00 USD.The gran total was $176.00 USD plus a weekend of mount and programing.
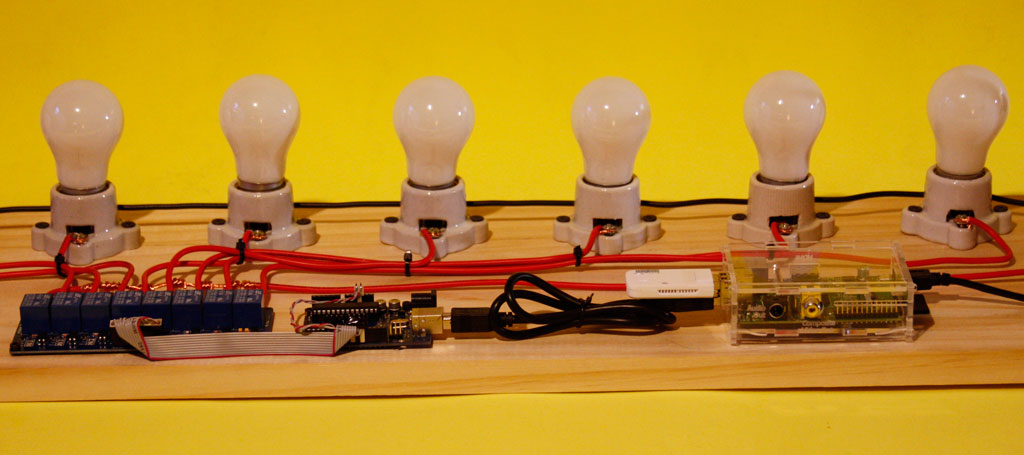
- I connect the relay board to the Arduino UNO, this to the Raspberry PI via USB.The final assembly is show in this picture:
You can see a demo on Youtube here: https://www.youtube.com/watch?v=rcFMJC4n4dQ
Programs
I wrote one Arduino Sketch for the Relay board control (arduino/relay.ino) and the control program to bond Asterisk with (bin/arduino_control.pl).
For the Arduino programing i use the Arduino IDE.
The i wrote a Perl script to handle the serial comunication with the Arduino USB and connects to Asterisk trough the AMI (Asterisk Manager Interface) and implement an aditional socket connection to console handle.
Configuration
- Edit and append on the file /etc/asterisk/manager.conf the AMI configuration for the perl program:
[arduino]
secret=openhardware
writetimeout = 10000
;read = system,call,log,verbose,agent,user,config,dtmf,reporting,cdr,dialplan
eventfilter=!Event: RTCPSent
eventfilter=!Event: RTCPReceived
read = system,call,log,agent,user,config,dtmf,reporting,cdr,dialplan
write = system,call,agent,user,config,command,reporting,originate
Reload the configuration with the user owner of the asterisk process with:
asterisk -rx'manager reload' - In the file /etc/asterisk/extensions.ael i wrote this test configuration:
context from-internal {
    888 => {
        goto ivr,s,1;
    };

    777 => {
        Answer;
        MusicOnHold();
        Hangup;
    };

    8378 => {
        Answer;
        Playback(beep);
        UserEvent(RELAY_8378,);
        Hangup;
    };
    666 => {
        Answer;
        Playback(beep);
        UserEvent(RELAY_1,);
        wait(1);
        UserEvent(RELAY_1,);
        UserEvent(RELAY_2,);
        wait(1);
        UserEvent(RELAY_2,);
        UserEvent(RELAY_3,);
        wait(1);
        UserEvent(RELAY_3,);
        UserEvent(RELAY_4,);
        wait(1);
        UserEvent(RELAY_4,);
        UserEvent(RELAY_5,);
        wait(1);
        UserEvent(RELAY_5,);
        UserEvent(RELAY_6,);
        wait(1);
        UserEvent(RELAY_6,);
        UserEvent(RELAY_7,);
        wait(1);
        UserEvent(RELAY_7,);
        UserEvent(RELAY_8,);
        wait(1);
        UserEvent(RELAY_8,);
        Playback(beep);
        Hangup;
    };
}

context ivr {
    s => {
        Answer;
        Background(silence/9);
    question:
        Set(TIMEOUT(response)=5);
        Set(TIMEOUT(digit)=1);
        WaitExten();
        goto question;
    };
    _X => {
       UserEvent(RELAY_${EXTEN},);
       goto s,question;
    };

    t => {
        goto ivr,s,question;
    };

    i => {
        goto ivr,s,question;
    };

}
Reload the configuration:
asterisk -rx'ael reload'I you see, i use the UserEvent fuction from the AMI interface to send custom commands to the arduino_control.pl program.
UserEvent(RELAY_X,);where
X
is the number of the electrical Relay. I use “8378” (TEST) to check the lights and 7828 (STAT) for query the relay’s status.You can interact directly via the 4446 TCP Port. The sample is using telnet:
$ telnet 192.168.1.89 4446
Trying 192.168.1.89...
Connected to raspbx.lan.
Escape character is '^]'.

arduino_control.pl v1.0 (? for help)

relay 8
8|on

relay 8
8|off

status
Status|off|off|off|off|off|off|off|off
you can see more options with the command
help
Don’t forget to subscribe a SIP extension to test.
Enjoy 🙂
Author
Fernando Romo (pop@cofradia.org)
License
GNU GENERAL PUBLIC LICENSE Version 3
https://www.gnu.org/licenses/gpl-3.0.en.html
See LICENSE.txt